
How to: add Twitter and Instagram Embeds on an Eleventy website using Sanity


Each week we go down rabbit holes so you don't have to. We share tactics, trends and valuable resources we've observed in the world of community building.
💫 Subscribe to The Observatory
At Orbit, we recently rebuilt our website from the ground up using a Jamstack approach and more specifically using Eleventy as our Static Site Generator and Sanity (https://sanity.io) as our CMS. I’ve talked a bit more about our approach and tech stack in the following Twitter thread:
One thing we wanted to keep from our old blog was the ability to easily embed Tweets or Instagram posts, as they can allow us to provide context, color, or variety to what could otherwise be a wall of text.

See how this tweet from David breaks up the text nicely?
In this post, we will walk through the Sanity setup and the Eleventy configuration that makes this possible—and even more importantly, really simple to use for editors!
Note: this post is aimed at developers who are already comfortable with both Sanity and Eleventy, as I am not going to explain how to set up either one of these tools. Fortunately, Sanity already has a template handy to get started in minutes!
Step 1: the Sanity Studio setup
Our first order of business will be to teach Sanity what a “Twitter” or “Instagram” block consists of.
As is usually the case in embeds, we’re going to refer to specific tweets or Instagram posts by their ID, visible in their URL:
{% c-block language="js" %}
https://twitter.com/Phacks/status/1281221982613311496 # ID: 1281221982613311496
https://www.instagram.com/p/CB-yYetJ4ky/ # ID: CB-yYetJ4ky
{% c-block-end %}
This is the approach taken on DEV, as you would display those Twitter or Instagram embeds with the following Liquid tags:
{% c-block language="js" %}
{% twitter 1281221982613311496 %}
{% instagram CB-yYetJ4ky %}
{% c-block-end %}
We can then define our Sanity schemas, saying that both a twitter block and an instagram have only one field, id:
{% c-block language="js" %}
// ./schemas/objects/twitter.js
export default {
name: 'twitter',
type: 'object',
title: 'Twitter Embed',
fields: [
{
name: 'id',
type: 'string',
title: 'Twitter tweet ID'
}
]
}
{% c-block-end %}
{% c-block language="js" %}
// ./schemas/objects/instagram.js
export default {
name: 'instagram',
type: 'object',
title: 'Instagram Embed',
fields: [
{
name: 'id',
type: 'string',
title: 'Instagram post ID'
}
]
}
{% c-block-end %}
And import them to the available schemas in Sanity Studio:
{% c-block language="js" %}
// First, we must import the schema creator
import createSchema from 'part:@sanity/base/schema-creator'
// Then import schema types from any plugins that might expose them
import schemaTypes from 'all:part:@sanity/base/schema-type'
import bodyPortableText from './objects/bodyPortableText'
// We import
import instagram from './instagram'
import twitter from './twitter'
// Then we give our schema to the builder and provide the result to Sanity
export default createSchema({
name: 'default',
// Then proceed to concatenate our document type
// to the ones provided by any plugins that are installed
types: schemaTypes.concat([
// ... other schemas
bodyPortableText,
// Will be available as { type: 'typename' } in bodyPortableText
instagram,
twitter
])
})
{% c-block-end %}
One last step before we can see our new blocks available in Studio: we need to import them into `bodyPortableText`:
{% c-block language="js" %}
// bodyPortableText.js
export default {
name: 'bodyPortableText',
type: 'array',
title: 'Body',
of: [
// ... other blocks
{
type: 'twitter'
},
{
type: 'instagram'
}
]
}
{% c-block-end %}
We can now see our new blocks right inside Sanity Studio’s editor, nice!
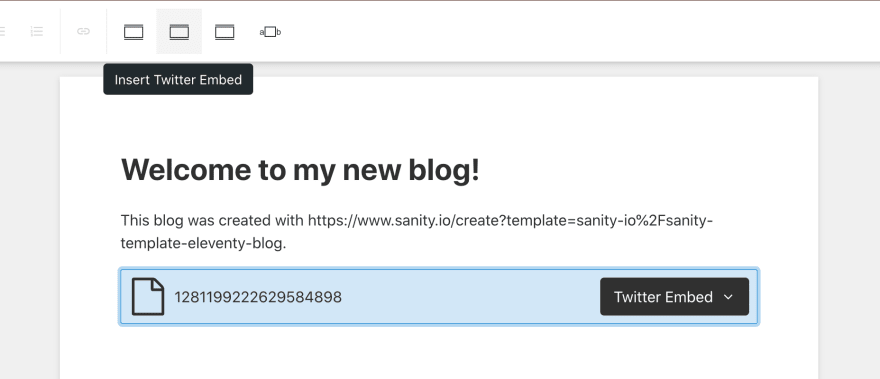
Step 2: previewing embeds in Sanity Studio
The editor experience is not satisfying yet, as there’s little visual feedback on the tweet or the Instagram post that is embedded. This can be solved using previews in Sanity Studio: we’re going to tell Studio how we want those blocks to look like inside the editor.
We won’t reinvent the wheel here and rely on the react-twitter-embed and react-instagram-embed packages to handle the previews for us.
After installing the packages with npm install --save react-twitter-embed react-instagram-embed, let’s define the previews in twitter.js and instagram.js:
{% c-block language="js" %}
// schemas/objects/twitter.js
import React from 'react'
import { TwitterTweetEmbed } from 'react-twitter-embed';
const Preview = ({value}) => {
const { id } = value
return (<TwitterTweetEmbed tweetId={id} options={{ conversation: "none" }} />)
}
export default {
name: 'twitter',
type: 'object',
title: 'Twitter Embed',
fields: [
{
name: 'id',
type: 'string',
title: 'Twitter tweet id'
}
],
preview: {
select: {
id: 'id'
},
component: Preview
}
}
{% c-block-end %}
{% c-block language="js" %}
// schemas/objects/instagram.js
import React from 'react'
import InstagramEmbed from 'react-instagram-embed';
const Preview = ({value}) => {
const { id } = value
return (<InstagramEmbed url={`https://www.instagram.com/p/${id}/`} />)
}
export default {
name: 'instagram',
type: 'object',
title: 'Instagram Embed',
fields: [
{
name: 'id',
type: 'string',
title: 'Instagram post ID'
}
],
preview: {
select: {
id: 'id'
},
component: Preview
}
}
{% c-block-end %}
And there we go! Twitter and Instagram embeds are now nicely displayed inside the editor. Sweet!

Step 3: displaying embeds in Eleventy
With the ability to add Twitter or Instagram embeds in Sanity Studio, we now turn to our Eleventy setup to try and display them in our blog posts.
Sanity uses a specification called Portable Text to allow editors and developers to extend the semantics of Markdown or HTML and allow for custom blocks of content, like our embeds there.
One way to translate those custom blocks into actual markup for websites is to use a serializer pattern that takes the JSON representation of the blocks as inputs and outputs the proper HTML. For example, here is the serializers.js file that comes with the Sanity Eleventy blog template, which translates the blocks authorReference, code and mainImage:
{% c-block language="js" %}
const imageUrl = require('./imageUrl')
// Learn more on https://www.sanity.io/docs/guides/introduction-to-portable-text
module.exports = {
types: {
authorReference: ({node}) => `[${node.name}](/authors/${node.slug.current})`,
code: ({node}) => '```
' + node.language + '\n' + node.code + '\n
```',
mainImage: ({node}) => `.width(600).url()})`
}
}
{% c-block-end %}
Our objective in this section will be to add two new serializers, twitter and instagram, that will take care of rendering the embeds.
Displaying Twitter embeds in Eleventy
We are going to use the official twttr.js library to embed Tweets into our blog posts. We do not reuse twitter-react-embed here, because that would require a React runtime. For performance reasons, it is best to not include a JavaScript framework if one does not really need it.
Following the Twitter documentation, inserting the following Javascript snippet inside our _includes/layout/post.njk template will load the twttr.js library, and turn all <div class="tweet" id="123456789"> nodes into full-blown twitter embeds:
{% c-block language="js" %}
<script>
if (document.getElementsByClassName('tweet').length > 0) {
window.twttr = (function (d, s, id) {
var js,
fjs = d.getElementsByTagName(s)[0],
t = window.twttr || {}
if (d.getElementById(id)) return t
js = d.createElement(s)
js.id = id
js.src = 'https://platform.twitter.com/widgets.js'
fjs.parentNode.insertBefore(js, fjs)
t._e = []
t.ready = function (f) {
t._e.push(f)
}
return t
})(document, 'script', 'twitter-wjs')
}
</script>
<script>
if (window.twttr !== undefined) {
twttr.ready(function (twttr) {
Array.from(document.getElementsByClassName('tweet')).forEach((tweet) => {
const id = tweet.getAttribute('id')
twttr.widgets.createTweet(id, tweet, {
conversation: 'none', // or all
cards: 'hidden', // or visible
linkColor: '#cc0000', // default is blue
theme: 'light', // or dark
})
})
})
}
</script>
{% c-block-end %}
We can now turn to our serializers.js file and turn each block into the corresponding <div class="tweet" id="<tweetID>"> node:
{% c-block language="js" %}
// utils/serializers.js
module.exports = {
types: {
authorReference: // ...
code: // ...
mainImage: // ...
twitter: ({ node }) => `<div id="${node.id}" class="tweet"></div>`,
}
}
{% c-block-end %}
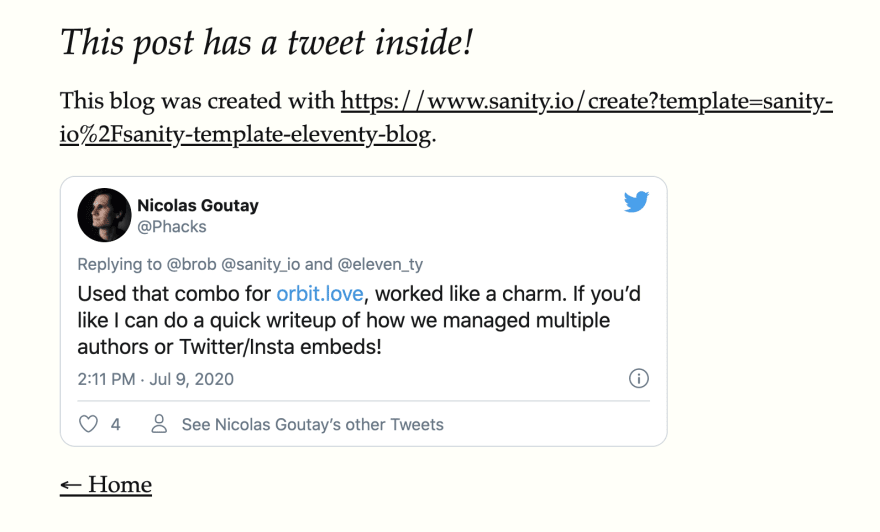
Tada! Tweets that we embed in Sanity Studio are now directly embedded, at the right place, inside our blog posts:
Displaying Instagram embeds in Eleventy
Instagram embeds will work very similarly to Twitter ones: using the official library, we’ll add a JavaScript snippet that will turn specific DOM nodes into proper Instagram posts.
Following the Instagram documentation, we can append this snippet to the _includes/layout/posts.njk template:
{% c-block language="js" %}
<script>
Array.from(document.getElementsByClassName('instagram')).forEach(
async (instagram) => {
const url = instagram.getAttribute('data-url')
const response = await fetch(
`https://api.instagram.com/oembed?url=${url}&maxwidth=480&hidecaption&omitscript`
)
const { html } = await response.json()
// https://stackoverflow.com/a/35385518
instagram.innerHTML = html
var tag = document.createElement('script')
tag.src = '//www.instagram.com/embed.js'
tag.setAttribute('async', true)
document.getElementsByTagName('head')[0].appendChild(tag)
}
)
</script>
{% c-block-end %}
and update our serializers.js file accordingly:
{% c-block language="js" %}
// utils/serializers.js
module.exports = {
types: {
authorReference: // ...
code: // ...
mainImage: // ...
twitter: ({ node }) => `<div id="${node.id}" class="tweet"></div>`,
instagram: ({ node }) => `<div data-url="https://www.instagram.com/p/${node.id}" class="instagram"></div>`,
}
}
{% c-block-end %}
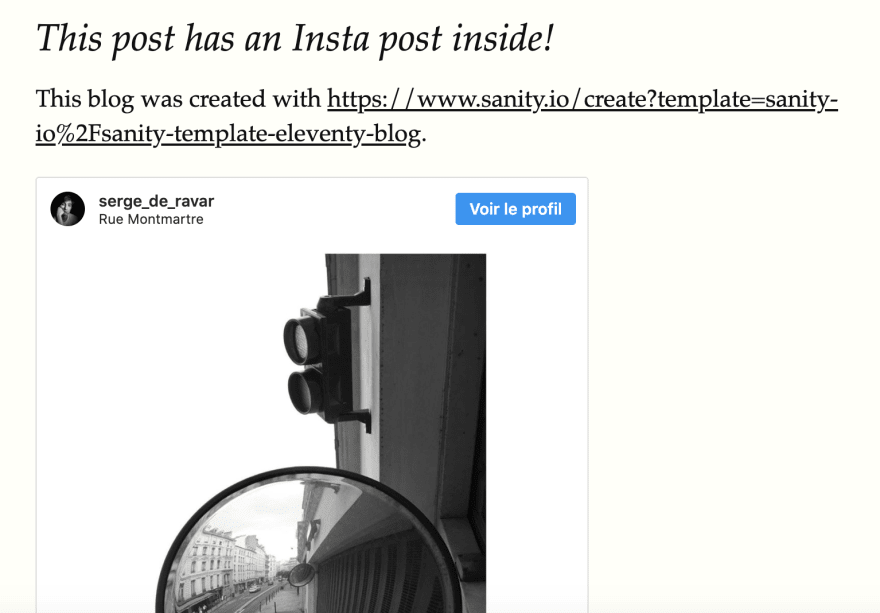
We now have Instagram embeds available in our blog posts!
Conclusion, source code, and further reading
In this article, we learned how to add Twitter and Instagram embeds to Eleventy blog posts using Sanity’s Portable Text capabilities.
The source code for the resulting Eleventy blog and Sanity Studio is available here: https://github.com/phacks/sanity-eleventy-twitter-instagram-embed.
Should you want to dig further on the topic, I can recommend the following resources:
- How to add a custom YouTube block by Knut Melvær on Sanity’s website;
- This Eleventy plugin to embed tweet directly with a custom directive by Kyle Mitofsky, which makes the tradeoff of better performance (the tweets are fetched at build time) for a slightly more difficult set up (you need a Twitter API token) and a minimal Twitter integration (no like or retweet counter, no conversations).


